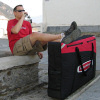
How to pack a bike
If you don’t know how to pack a bike don’t worry, we’re here to help you.
When travelling abroad with your bike there are many ways in which you can package it in order to keep it safe. We recommend using a bike bag with a bike box inside it. Please check the terms and conditions of your carrier to ensure your packed bike does not exceed weight limits.
Below those few paragraphs you will find the complete tutorials with photos on how to pack your bike and not damage it during transport.
If know how to pack your bike but don’t feel like bringing it for whatever reason, you can always rent a bike from us.
How to pack a bike – Which bag to choose?
There is dozens of bike bag brands and shape to choose from, if you’re unsure of which one to pick, you can check out this article for the best bike bags of the year.
We support local bike shops and believe that you should also consider what your LBS has in stock. They will also help you if you don’t feel confident packing your mountain bike.
When purchasing a bike bag, always consider the weight of the bag itself as it will impact the total weight of your luggage. This will potentially impact the price you have to pay to fly with it.
As mentioned above, another solution is to go to your local bike shop and ask for them to pack your bike for you in a cardboard bike box. This is an economic solution but it will be hard to put the bike back in the box on the way back!
For the purpose of these instructions we have assumed that the bike does not fit in the box with its wheels on. The approximate time for packing up a bike is 30 minutes to 1 hour.
METHOD 1
- Acquire bike
- Acquire bike bag
- Remove front wheel
- Attempt to ram into bag as is
When this fails, have a rethink and spend sometime doing it properly see below…
METHOD 2
Tools required
- Packaging Materials
- Masking tape
- Suitable Allen Keys
- 15mm spanner/pedal spanner
- Brake spacers/cardboard
- Fork spacers
STEPS:
Remove the pedals by turning right pedal anti-clockwise and left pedal clockwise with a 15mm spanner or pedal spanner. Wrap the pedals in something and put them in a place where you won’t forget them! Pack the spanner with them.
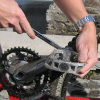
Remove the wheels by undoing the quick releases. Remove the skewers and carefully wrap them and put them with the pedals for packing later.
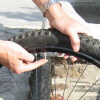
Let the air out of the tyres as airlines do not want inflated tyres on the planes (some check too)
Package the wheels using some polystyrene to protect the disc rotors from being bent and place the wheel in a wheel bag if available. Put the wheel bags to one side until the bike is ready to be put in the bag.

Insert disc brake spacer to prevent the brake pistons moving during transit, put a brake space between the pads. A thick piece of card also makes a good spacer for this.
Insert fork and frame spacer to prevent fork and frame being bent, insert a plastic frame spacer into the fork/rear drop outs. Your local bike shop may be able to supply you with these free of charge. A useful alternative is two old hubs and skewers. Both solutions prevent the bike getting bent if a heavy weight is placed on it.
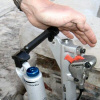
Remove rear derailleur using a suitable allen key to prevent it getting damaged whilst in transit. It’s also worth checking you have a spare hanger at this point too. If you have an easily removable chain e.g. a SRAM chain with Powerlink, it is worth removing the chain at this point and putting it with the pedals and skewers. If removing the chain requires a chaintool, leave it on as removing it will weaken the chain.
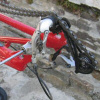
Package the rear derailleur and fasten it with the rear part of the frame. The frame then protects the derailleur from impact and this also prevents it from hanging loose.
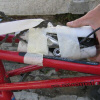
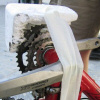
Protect the chainrings by taping some polystyrene to the bottom of the rings. This stops the teeth on the outer ring getting broken or bent during transport. Taping the polystyrene in place also prevents the pedals from turning.
Remove the stem by undoing the headset bolt and the two stem bolts. Remove the stem from the fork steerer and replace the headset cap and bolt ensuring that you do not lose any headset spacers.
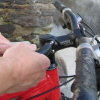
Package the bars so that they are protected and do not scratch the frame and forks when packed away. 2 useful ways of preventing brake levers getting bent are to either a) pull the lever towards the bars and cable tie it to the bar or b) put a cork from a wine bottle between the lever and the grip to stop the lever being moved.
Remove the seatpost from the frame and wrap the post with a suitable packaging material
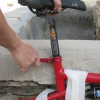
Protect the frame with suitable pipe lagging or polystyrene packaging. Tape the handlebars flat to the fork and frame so that they are held out of the way

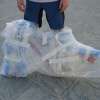
Wrap the frame in bubble wrap. This stops the other things in the box scratching the frame and adds some extra cushioning.
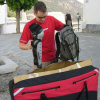
Get a suitable bike bag. We use a padded Neil Pryde bike bag with a bike box inside it. The box was donated to us by our local bike shop free of charge and cut down to fit in the bag. The box gives the bike bag structure and more rigidity.
(Note: A well re-enforced bike box is a suitable alternative to a bike bag if cost is an issue.)
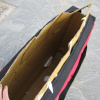
Put everything into the bag. Insert the frame first, then put a wheel bag down each side. Don’t forget to pack the saddle, pedals, skewers, tools for rebuilding bike and bike spares.
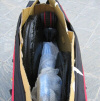
Use the rest of the space in the bike bag. The remaining space in the bag can be used for pads, backpacks, biking shoes etc.
Relax and have a nice cold beer. You’ve probably deserved it.
